Tag Archives: 2.4

Set Out-of-Office Status

You can set your out-of-office status in eTMF to automatically delegate your tasks to another user. With the appropriate permissions (i.e, Manage Users feature permissions), you can also set out-of-office status for another user.

To set an office status, navigate to the right side of any page in the eTMF and select your user name to display an associated drop-down menu. From the menu, select “Set Out of Office.”

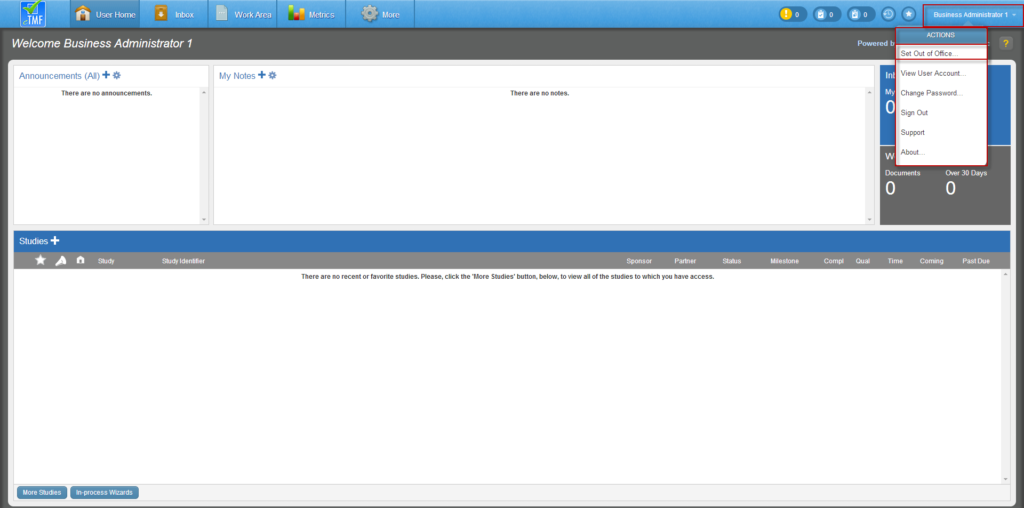
The Set Out-of-Office dialog will display.

Set Out-of-Office Status

To set a user to have the status of ‘out-of-office’, select the “Yes” option for the Is Out-of-Office Enabled toggle in the Set Out-Of-Office window.

To set an out-of-office status for an indefinite period of time, select the “No” option for the Is Using Out Of Office Range toggle. To set a timeframe for the out-of-office status, select “Yes” for the Is Using Out Of Office Range toggle. Then, select a desired start date/time and end date/time using the associated fields.

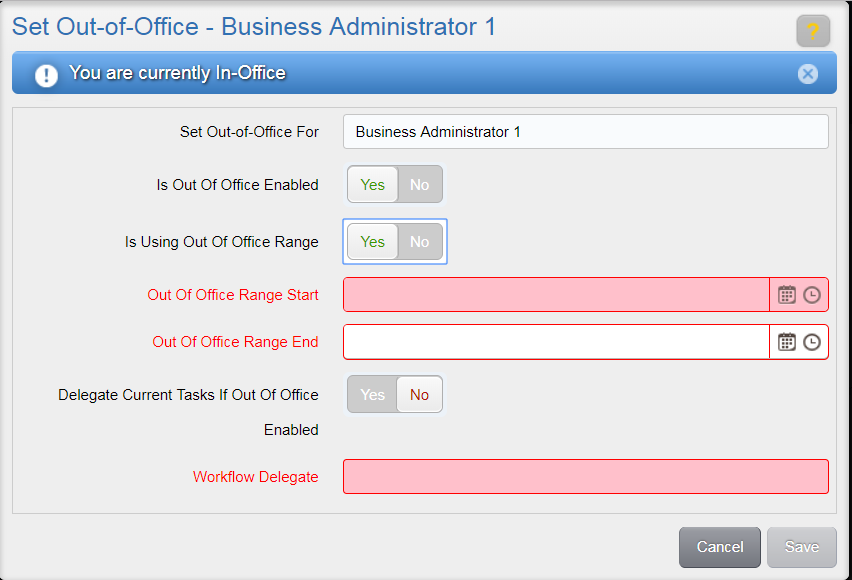
Indicate whether or not you want to delegate tasks that are already in your inbox by selecting either “Yes” or “No” in the toggle associated to the Delegate Current Tasks if Out of Office Enabled option.

Then, select a user to delegate all current (if applicable) and future tasks to while out of office by using the Workflow Delegate drop-down. All tasks sent to you while you are out of office will then be sent to the user you selected. Available users are those with the same role(s) as the out-of-office user. If the out-of-office user has study-specific access, the available users are also limited to those with access to the same studies.

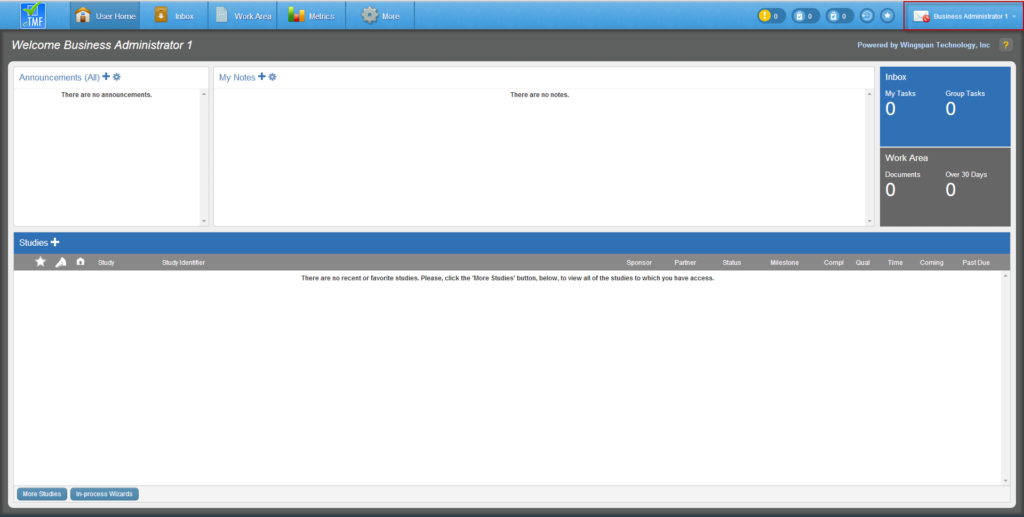
Click Save. The window will close. If you have set yourself as out-of-office, an Out-of-Office icon will be displayed next to your username in the top right corner of the page. If you have set another user as out-of-office, the icon will be displayed in the same location for that user when they log into the system.

Manually End Out-of-Office Status

To manually end your out-of-office status (e.g. if you selected No in the Is Using Out Of Office Range toggle when initiating the Out-of-Office status), navigate to the right side of any page in the eTMF and select your user name to display an associated drop-down menu. From the menu, select “Set Out of Office.”

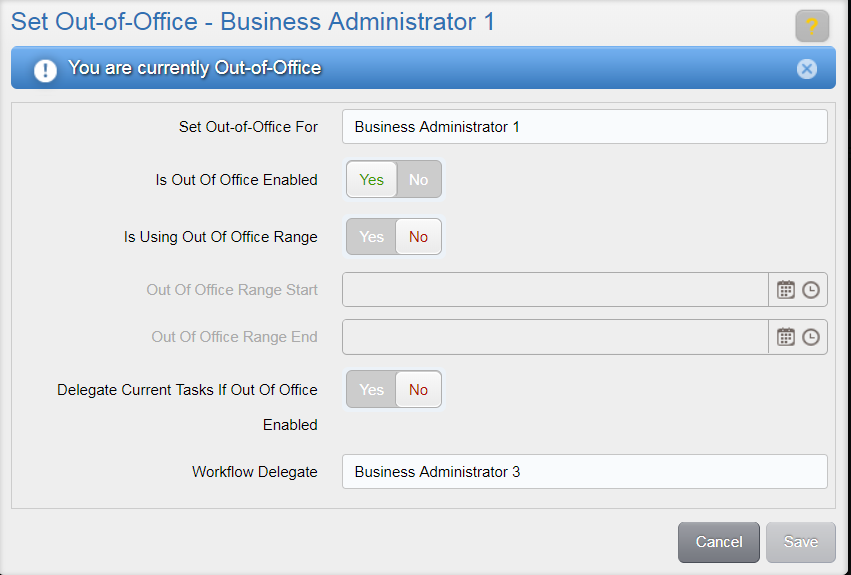
The Set Out-of-Office window will show that the user is currently Out-of-Office.

Select “No” for the Is Out of Office Enabled toggle and click Save.

The Set Out-of-Office window will close, tasks will no longer be delegated to the designated Out-of-Office recipient, and the Out-of-Office icon will no longer display next to the user’s username in the top right corner of the eTMF.

Delete Study Item

Empty Study Items that are unnecessary may be deleted by users with appropriate permissions. Study Items should only be deleted if they were created in error or are no longer relevant to the specific study. Study Items that are fulfilled (either with or without content, and even if not activated) cannot be deleted.

Tip: For study items that do not need to be present in the TMF that either need a permanent record or cannot be deleted, use the Mark as Fulfilled option. To remove a study item that has been fulfilled or finalized, use the “Virtual Delete” functionality.

Items that can be deleted

  • Documents marked as Core in the master list but not added to your study by a study, country, or site wizard.  
  • Documents that do not have the Is Core setting.  

 Items that cannot be deleted:  

  • Documents marked as Core in the master list and added to your study using the study, country, or site wizard.  Note: These study items have an Is Core setting. 

To delete a single study item:

  1. Go to the study item, click the Actions Menu icon, then select Delete Study Item

2. In the Delete Study Item component window, select a Reason, enter additional Comments if necessary, and click Delete

The study item will no longer appear in the TMF, and the action will be recorded in the audit trail.

Note: If you believe that a Study Item that should have a ‘Delete’ option does not have that option on its Actions menu, it could be because the Item had a Final document fulfilling it at one time.

To delete all study items:

  1. In the Study Items List page, select the actions menu and select Delete All. Note: If there are more than 50 items on the Study Items List page you will be alerted that you can only delete a maximum of 50 items at a time.
  2. In the Delete All Items window, select a Reason.
  3. Enter a Comment.
  4. (Optional) Deselect any items you do not wish to be deleted.
  5. Click Delete Selected.


Adding Announcements or Notes on a Home Page

Add a note to display a personal reminder in the Notes area on your User Home page or a Study Home page. Add an announcement to display a message that appears in the Announcements area of the User Home page or a Study Home page for all users.

Neither system-wide nor study-specific announcements are treated as “TMF content”, so they are not included in exports or treated as official files.

Add a New Announcement

Users with appropriate permissions can create a message that appears in the Announcements area for all users.

  1. Click the “+” next to Announcements.
  2. The Edit Announcement screen will display.
  3. Enter the text of your Announcement in the box.
  4. Click Save.

Note: Announcements are limited to 2000 characters. The counter in the bottom right corner of the Add an Announcement window shows how many characters you have entered in the box so far.

Add a New Note

Notes can be created on the User Home Page or a Study Home Page. To create a Note that will appear in the My Notes area only for the logged in user:

  1. Click the “+” next to My Notes
  2. The Add a Note screen will be shown.
  3. Enter the text of your Note in the box
  4. Click Save

Notes created on the User Home Page will only be displayed on the User Home Page. Notes created on a Study’s Home Page will only display on that Study’s Home Page.

Notes are limited to 2000 characters. The counter on the bottom right corner of the Add a Note window shows how many characters you have entered.

Drag and Drop to Study Item

If you are using Google Chrome or another compatible browser and need to upload a document to a study item, you can drag a file from your file explorer and drop it directly onto the Study Item as shown below.

The document will go to the user’s Work Area for Indexing.  You can drag and drop as many files as you like before indexing.

If a study item already has finalized content, the dropped file will become a new version once finalized.

Note: Drag and Drop capabilities will be disabled for program level study items, enterprise level study items, ad hoc study items, proposed study items, and study items requiring mediation (i.e., study items missing required field values as a result of an Update Placeholders operation).

Create Expected Documents

You can create expected Study Items by clicking the Create Expected Documents button in the Work Area or from the Actions menu of a study item. The Create Expected Documents button will display the Create Expected Documents screen.

You can use the Create Expected Documents screen to plan for the scanning of Ad-hoc documents and other documents without matching Study Items. Select the appropriate study, country, and site and indicate the number of expected documents to create. You can create a maximum of 100 Expected Documents at once. The expected documents will be created in your Work Area where you can match to study items, provide metadata, and generate Transmittals.

If study items already exist for these documents, it is more efficient to locate the study items and create expected documents for them as the manual step of matching to a study item will not be needed.

Generate Transmittals

A Transmittal can be generated for a single expected document in your Work Area by selecting “Generate Transmittal” from the Actions Menu associated with that document. Transmittals can be created for multiple Expected Documents in your Work Area by selecting “Generate Transmittals” from the Actions Menu for the Work Area page.

If there are more than 50 items in your Work Area you will be alerted that the operation can only be performed on a maximum of 50 items at a time. Clicking Ok will allow you to proceed with the first 50 items selected.

This will display the Generate Transmittals window. Any items that already have content will not be included in the list. Deselect any documents that you do not wish to generate a transmittal for before clicking Generate Transmittals.

This will start a document download that includes a Transmittal page for each selected expected document.

Delegate Task

If you have the ability to delegate a task to another user, a “Delegate” option is available in the Actions menu for the task within the Inbox. To delegate the task, select the “Delegate” option.

In the Delegate screen, select a Recipient to receive the task from a list of qualified users. Once a recipient has been selected, click Save. The task will appear in the new recipient’s inbox and will be removed from your inbox.

You can also delegate multiple tasks at once to another user using the “Delegate All” option. Click here for more information.

Timeliness Dashboard

The Timeliness Dashboard displays detailed information on the amount of time it takes for documents to process through QC within various interactive charts and tables.

eTMF uses the following criteria in timeliness metrics and reports: 

  • Documents that are not authored 
  • Documents whose study has Include in Metrics = Yes.  
  • Documents that are Unblinded, Final, Obsolete, or Superseded 
  • Documents for studies the user has access to 
  • User selected criteria. 

Calculation 

The current Timeliness metric is calculated using the following equation: 

 % Timeliness = [(#documents finalized within X days of their receipt date/ #documents finalized) X100], where X is the acceptable threshold after the document receipt date.  

 The current is displayed alongside the portfolio average, which is defined as the combined timeliness metric of all the studies to which the user has access. 

Note: Because the calculation considers all document versions, your timeliness metric may be affected by document revisions made after finalization. To prevent this, you can exclude document revisions from the timeliness dashboard. In the Narrow Choices panel of your dashboard, click the checkbox Yes under Exclude Document Revisions 

Timeliness Dashboard Fields

Analysis

The Analysis area allows you to view a breakdown of the time documents spend in particular statuses. The data can be grouped using the selections in the Analysis dropdown. The image above shows grouping by country. If you select a grouping from the table, the dashboard filters to show only relevant data for that grouping.

Document Timeliness

The Document Timeliness area displays the current timeliness compared to the portfolio average (i.e., the combined timeliness metric for all studies you have access to). You can view the average number of days it has taken a document to be finalized, to complete QC Rework, and to complete Request List Change.

Historical Timeliness

The Historical Timeliness section contains a bar chart that displays the percentage of documents that were finalized within the configured timeliness metric for each month within the past year.

Top 5

The Top 5 area shows the top slowest to process Document Types for the selected data set.   Selecting Document Type will add it to the set of filters applied.

Workflow Stages

The Workflow Stages area displays a doughnut chart that provides a more detailed look into the workflow stages of documents. You can hover over a section to view the average days it takes documents to process through the selected workflow stage. In the center of the chart, the average number of days it takes documents to process from receipt to finalization is displayed.

Workflow Stages Bypassed QC

The Workflow Stages Bypassed QC area displays a doughnut chart that examines document timeliness for documents that have bypassed QC. You can hover over a section to view the average days it takes documents to process through the selected workflow stage. In the center of the chart, the average number of days it takes documents to process from receipt to finalization is displayed.

Access and Modify your Timeliness Dashboard

To view the timeliness dashboard from your Study Homepage:

In your study homepage, click the Actions icon, then select Reports and Dashboards > View Timeliness Dashboard.  

To view the timeliness dashboard for all studies: 

Click More in your Global Header then select Dashboards > View Timeliness Dashboard

To modify your dashboard view:  

Filter the dashboard by selecting any of the filter facets in the Narrow Choices panel.  

Collapse the Filters Panel (and expand the display of charts and tables) by selecting the left-facing arrow Show/Hide Filters.  

Collapse any of the dashboard areas by selecting the down arrow next to the area’s title.  

To export your dashboard information: 

  1. In your Dashboard, click the Export to Excel icon.  
  2. Click the More actions icon in the global header, then select View Downloads. 
  3. Click your report.  

Note: that if there are more than 32,000 results to export, only summary information from the charts will be included in the export file; report details will not be included. 

Approving a Package

A package in Draft status for which all required Document Types/Study Items have been finalized can be internally approved to indicate that the package is complete and is ready for submission, audit, etc.

Certain types of packages may also require external approval (or rejection). For example, IRB/IEC submissions are typically send outside of the organization for approval. If a package requires external approval, you can mark the package to indicate that the outside organization has either approved or rejected the documents.  Documentation supporting the external approval or rejection of the packages can be linked to the package if Study Items exists for that documentation on the Study Item List.

Internally Approve a Package

Prerequisites: To approve a package, you must be a member of the TMF Create Packages security group and a member of an Approval Group for the Package Definition.

  1. Navigate to the Study Item List of the study to which the package is related.
  2. From the Study Items Breadcrumb Menu, select “Package List.” The Package List Page is displayed.
  3. Locate the package you want to approve and select “Approve Package” from the package’s Actions Menu.
  4. If the package requires an approval with signature, enter your eTMF User Name and Password credentials in the corresponding fields.
  5. On the Approval screen, select “Approve.”

The status of the package changes to Internally Approved.

Record External Approval

Prerequisite:  A package can be marked as externally approved only after it’s been internally approved. In addition, the External Approve action can be performed only by users within Approval Groups for the Package Definition.

  1. Navigate to the Study Item List of the study to which the package is related.
  2. From the Study Items Breadcrumb Menu, select “Package List.” The Package List Page is displayed.
  3. Locate the package you want to approve and select “Record External Package Approval or Rejection” from the Actions Menu. The Package Approval (External) screen is displayed.
  4. In the External Approval or Rejection Date field, select the date.
  5. (Optional) to attach supporting documents, do the following:
  • Select “Select External Support Documents.” The Select Study Items screen appears.
  • Select the check box for each Study Item to add as a supporting document. Use the Search and filters fields to the left to reduce the list of Study Items as needed.
  • Select “Select.” The items are displayed in the External Approval or Rejection Support Documents grid.
  1. To approve the package, select “Approve Package (External).” The status of the package changes to Externally Approved.
  2. To reject the package, select “Reject Package (External). The status of the package changes to Externally Rejected.

Report Issue

This feature is available to users added to the group “TMF Report Study List Issues”.  (You may wish to place the group “TMF All Users Except Regulatory” inside of this group).  It allows a user to email another user a message about a document along with a link to the document (and to the task if the user has received a task).  

To report an issue, a user selects a document or Study Item and selects the Report Issue menu item.  

The list of users shown on the screen includes all users associated with the document or Study Item. The user field can be used to select a different user to receive the issue report.

The list of reasons in the Reason dropdown is set in the Reasons for Report Issue dictionary.

To Enable:

  1. Add new values to the Reasons for Report Issue dictionary; disable any out of the box values you do not want
  2. Add any desired users or groups to the TMF Report Study List Issues group.
image_pdf