Tag Archives: 2.4

Match to Study Item

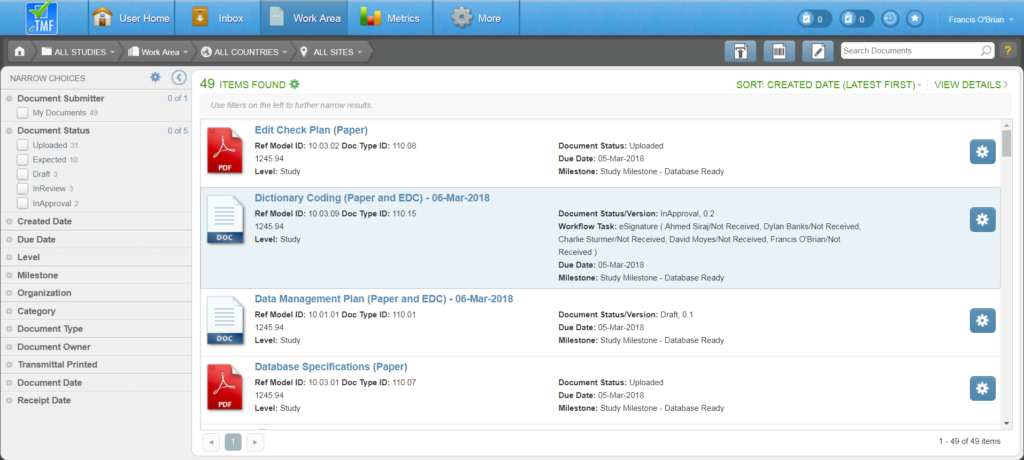
Use the Match to Study Item screen to match a document Uploaded to your Work Area with a specific Study Item in the eTMF. This step takes place after you have uploaded the document  and before you submit the document to Quality Control. The Match to Study Item Screen is also used when Authoring a document within the eTMF.

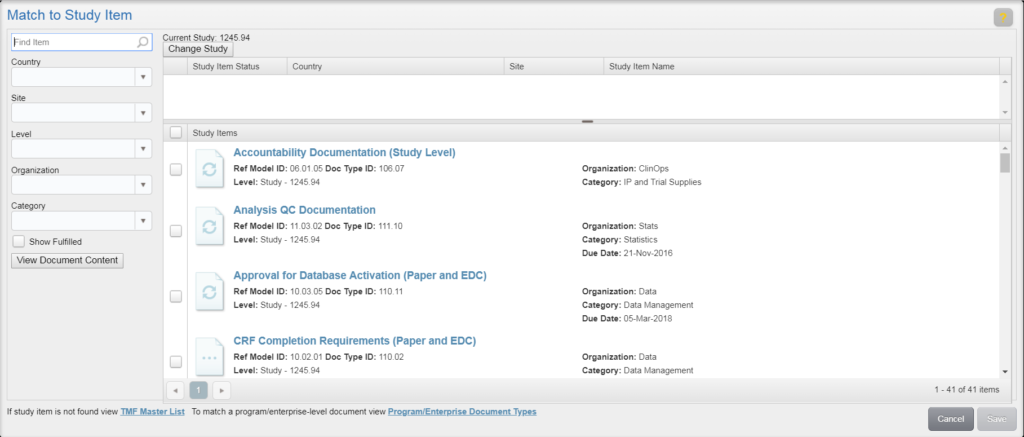
On the Match to Study Item screen, use the Change Study button at the top to select or change the study to which the document should be associated. If needed, select a CountrySiteLevelOrganization and Category to filter the list of available Study Items. If you want to associate the document with a study item that is already indexed to a document and finalized, select the Show Fulfilled check box to display study items fulfilled with existing content. The new document will be treated as a new version.

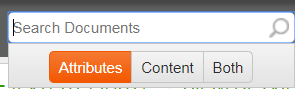
If you are indexing uploaded content, you can click View Document Content to check the content against the study item without leaving the screen. The content of the document will display in place of the list. To return to the list, click Show Search Results.

Once you have found the appropriate study item(s), select the corresponding check box and click Save.

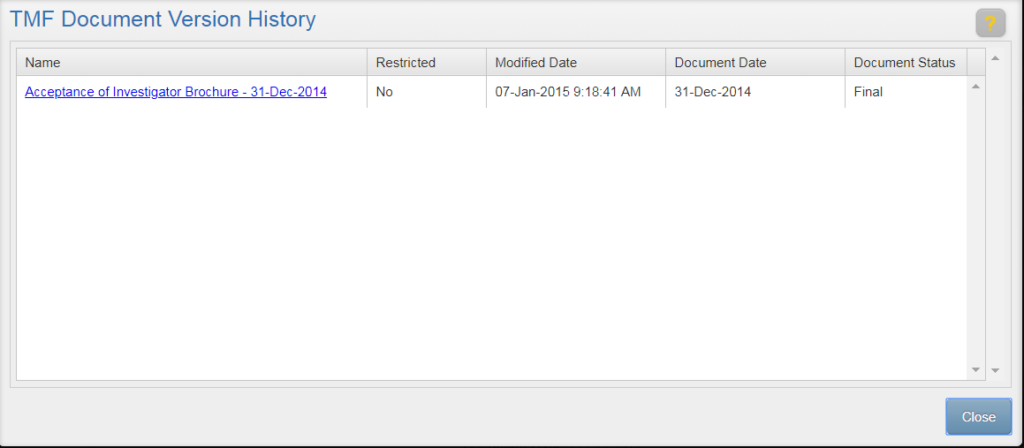
If you select a Study Item that already has pending and/or final content, an informational message displays, stating that a new version will be created once the content is finalized. To ensure you are not creating a duplicate, do the following for the study item selected:

  • Check the date (in the Study Item Name).
  • View the content by clicking the Study Item Name hyperlink.
  • To view earlier versions, click View Versions.

If creating a new version is not your intent, deselect the study item and locate the correct one.

Match to a Document Type

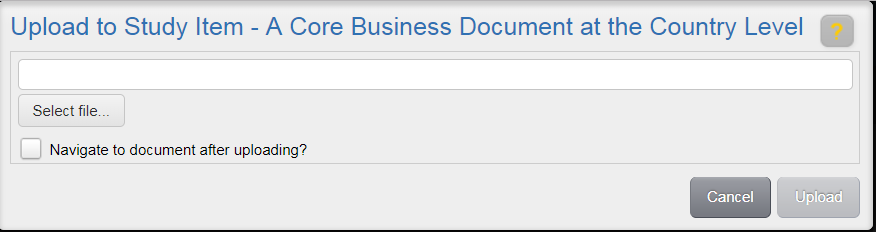
If your document does not match any existing study items, you can click TMF Master List in the bottom-left to match to a document type. Select the document type, complete required fields on the Propose Study Item form, and click Save.

When you submit the study item to QC, it will first be sent to the Study Owner for approval to create a new study item. If approved, it will then be sent to QC. If not approved, it will be returned to you with the Study Owner’s comments.

Match to a Program/Enterprise Document

To match to a program or enterprise-level document, click Program/Enterprise Document Types. Select the Document Type from the list, review and update fields  on the New Program/Enterprise Document form as necessary, and click Save. When the document is finalized, Study Owners will receive and email notification so that they can associate the document with the appropriate studies.

Work Area

Your Work Area contains all documents you have uploaded that have not yet been finalized. Your Work Area also contains all expected documents you have created as part of the scanning process. Work Area documents are visible only to you and to other users who have permissions to manage other users’ Work Areas.

You can access your Work Area from your User Home Page or from the primary header. The Work Area displays the following elements:

  1.  Narrow Choices Panel (Left)
  2.  Work Area List Panel (Center)
  3.  Breadcrumb Trail (Top Left)
  4.  Search Work Area Bar (Top Right)
  5. Buttons (next to Search Bar)

Narrow Choices Panel

The Narrow Choices panel is located on the left side of the page. The Narrow Choice panel allows the user to narrow down the documents shown in the study item list. This is done by selecting a filter value in the Narrow Choices panel. Once selected, the list will be updated to include study items that match the specified filter value. If multiple values are selected, the list will be updated to include items that match all specified values. Filters can be cleared or saved by clicking on the cogwheel at the top of the panel.

See Also: How to “Narrow Choices” with Facets

Document List Panel

The Document List panel is located in the center of the page. The Document List panel displays the documents for which you are responsible (i.e., documents you’ve uploaded and expected documents). If you accessed the Work Area from the Work Area tab or by selecting the Documents link count on your User Home page, the Work Area displays your documents across all studies by default. If you accessed the Work Area by selecting the Over 30 Days count on your User Home page, the Work Area is automatically filtered to display only those documents. You can also apply additional filters using the Narrow Choices panel and/or the Studies, Countries, and Sites Breadcrumbs.

For each item, the Document Type ID, Due Date, Level, Milestone, and Document Status will be displayed.

Many actions can be accessed for each item by selecting the associated cogwheel. These actions may include any of the following:

  • Generate Transmittal:  Displayed for an expected document, this option allows you to generate a transmittal page for scanning
  • View Native Content:  Displayed if the original content uploaded is not PDF; allows you to download the original content in its native format
  • View PDF in Acrobat: Displayed if a PDF rendition of the content exists; allows you to download the PDF
  • View PDF in Browser:  Displayed if a PDF rendition of the content exists; allows you to open the PDF in a new browser tab/window
  • View Audit Trail:  Allows you to view the audit trail for the item
  • Delete:  Allows you to remove the document from the TMF

Breadcrumb Trail

The Breadcrumb Trail, located at the top left side of the page, contains a series of breadcrumbs that helps you figure out where you are and which items are displayed (e.g., items for all studies and all countries). You can use the breadcrumbs in the Work Area to update the display of items in your Work Area:

  • By study, by country within a study, and/or by site within a study
  • By study level documents only, across all studies

You can also use a breadcrumb to navigate to other list views easily. 

Quick Search Bar

The Quick Search Bar is located in the top right corner of the page. The Quick Search bar allows you to search for study items using keywords. The keywords work as a filter which can be removed by clicking the X next to the keyword at the top of the Study Item List panel.

When using the Quick Search bar, enter full words, and enclose phrases within quotation marks. You can use the asterisk wildcard character after a letter or number to represent a series of unknown characters. For example, enter Inv* to match to any item containing the letters “Inv” in that order. If the full text indexing feature has been enabled for your environment, you can choose to match your search text against attributes, content, or both.

Buttons

Buttons adjacent to the Quick Search bar can be used to upload documents:

ISF Export

Users with appropriate permissions can download an ISF Export package from the Study Item list by selecting “ISF Export” from the list’s Actions menu. This will display the ISF Export window with a warning about potential privileged and confidential information within the export. Review the warning before continuing.

Select a Country and Site to export from by using the drop-down arrows next to each field. When the fields have been selected, choose Export. The system creates a Zip file containing the requested information, which is available on the Downloads page. You will be notified of export success or failure via email. If the export is successful, the email will contain a link to the file on the Downloads page.

ISF Exports include only the native content and PDF rendition (if exists) for each Final study item marked as Needed for SMF at the program/enterprise/study level, at the country level for the selected country, or at the site level for the selected site.

View Versions

In some situations, it may be helpful to view the historical versions of documents for a Study Item.

To view the versions, select “View Versions” from the Actions menu next to the Study Item on an items list. On the TMF Document Version History window, you can view information about whether the document is restricted, the date it was modified, its Document Date, and document status. You can select the hyperlink for a version to view the document in a separate browser tab or window.

Click Close to exit the window and return to the List page.

Upload to Study Item

The Upload to Study Item screen is displayed when you choose either of the following options:

  • Upload to Study Item (accessed from the Actions menu for a study item in the study item list)
  • Import Document (accessed after choosing the Author Document button in your Work Area)

The Upload to Study Item screen allows you to browse for the file to upload. On the Upload to Study Item screen, click Select file, navigate to the file within the file explorer window, and double-click on the file to select it. The maximum file upload size is 2 gigabytes.

If you would like to continue processing the document you are uploading, select the Navigate to document after uploading check box*. If you would like to upload other documents before Indexing, leave the Navigate to document after uploading check box unchecked.

Note: This check box does not appear if you accessed the screen via the Author Document button in your Work Area.

Click Upload to upload the file.

Mark as Fulfilled

The Mark Item Fulfilled function allows a Study Owner to record that a study item will not be fulfilled by a document in the eTMF. Marking a study item as fulfilled will allow the item to be tracked in the metrics as a fulfilled study item as opposed to having the item show as missing.

Examples of reasons why an item will not be fulfilled by a document and should be marked as fulfilled:

  • Termination of a site or vendor
  • Natural disaster that results in the loss of documents
  • Document maintained in another system
  • Subject no longer part of study

To mark study item as fulfilled, choose an unfulfilled study item, open its associated Actions menu and select “Mark as Fulfilled.”.

This will open the Mark as Fulfilled component window.

Choose a reason from the Reason drop-down, enter additional Comments if necessary, and enter the URL to the document (if available). If a URL has been entered, you can click the Test URL button to verify that the URL is correct and works as expected. The Test URL button will open a separate browser tab, or window, depending on your browser settings. To finish, click Mark Fulfilled.

The Study Item’s icon will now indicate to show that the item is Fulfilled without Content. The Study Item record will include a hyperlink to the document (if specified), and the change to the Study Item will be recorded in the Audit Trail.

Mark All Items as Fulfilled

The Mark Item Fulfilled function allows a Study Owner to record that a Study Item will not be fulfilled by a document in the eTMF. Marking a study item as fulfilled will allow the item to be tracked in the metrics as a fulfilled study item as opposed to having the item show as missing.

How to Mark all Items as Fulfilled

To mark all Study Items as Fulfilled, select the Actions Menu above the items list and select “Mark All As Fulfilled.” If there are more than 50 items in the study you will be alerted that you can only Fulfill a maximum of 50 tasks at a time. Clicking Ok on the alert will allow you to proceed with the first 50 items selected.

The Mark All Items as Fulfilled screen will display. If there are items in the study that could not be marked as fulfilled, the screen will display an alert saying that the Study Items that could be marked as fulfilled are shown below.

Choose a reason from the Reason drop-down and enter additional Comments if necessary.

Review the list of Study Items and deselect any that you do not wish to mark as fulfilled. Once the list has been reviewed, click Mark Selected Fulfilled.

The selected Study Items will now appear as Fulfilled without Content (icon), and the change to the Study Items will be recorded in the Audit Trail.

Create Expected / Generate Transmittals

The Create Expected/Generate Transmittals screen is used to create expected documents and generate transmittals for items in bulk. Use when the Items List is filtered down to results that the user has the documents for or expects to receive documents for.

To reach the Create Expected/Generate Transmittals screen, select Create Expected/Generate Transmittals from the Actions Menu on the Study Items List page, Favorite Study Items page, or Study Items Clipboard. If there are more than 50 items listed on the page you will receive a warning that the operation can only be performed on a maximum of 50 items at a time. Selecting Ok will allow you to proceed with the first 50 items selected.

Reasons for an Alert

You may receive an alert that some of the selected study items could not have an Expected Document created for them. Potential reasons for why study items could not have an expected document created for them include that the study is locked or archived, the study item is Ad-hoc or proposed, or the study item is at the enterprise or program level.

How to use the Create Expected/Generate Transmittals Screen

From the Create Expected/Generate Transmittals screen, choose one of the two options based on the documents that you have selected.

Option 1: “I have received these documents.” Use this option when you have received the selected documents already and want to create Expected Documents in your Work Area for them.

Option 2: “I plan to receive these documents.” Use this option when you have not yet received the selected documents but wish to generate Transmittal for them now so they can be Indexed once they are scanned.

By default all documents in the list will be selected. Any documents which you do not wish to Create Expected Documents for can be deselected by clicking the green box next to that option.

When only the appropriate documents are selected, click Create Expected Documents to finalize the operation.

Document Templates List

Users with appropriate permissions can access the Document Template List by selecting the More Actions menu in the Top Bar and selecting View eTMF Configurations.

The Document Templates List is where the templates used to author documents in the eTMF can be managed. From the Document Template List you can change content, metadata, or create new templates.

The list of templates can be filtered using the Facets to the left of the Template List.

To create a new template, select the Actions menu next to the Items Found count and select Create New Template. This will display the Create Document Template Window.

Actions can be performed on individual Templates by selecting the actions menu next to that Template.

Delegate All Tasks

Users with the ability to manage other users’ Inboxes may occasionally need to reassign tasks based on workloads. Tasks can be reassigned individually or in bulk.

Reassign all tasks in the Inbox by selecting the Actions menu icon and selecting “Delegate All Tasks.” If there are more than 50 tasks in the Inbox, you will be alerted that you can only delegate a maximum of 50 tasks at a time. Clicking Ok on the alert will allow you to proceed with the first 50 tasks selected.

From the Delegate All Tasks screen, you can select a Recipient from a list of users. Once a recipient is selected, tasks that can be delegated to that user will be displayed. You may exclude any tasks that you do not wish to have delegated to that user by deselecting the check box next to those tasks.

Click Delegate Selected Tasks in the bottom right corner of the Delegate All Tasks screen to send the selected tasks to the recipient’s inbox.

image_pdf