An item that has been checked out can be checked in to release the lock on the item and to upload the revised document.
To check in, select “Checkin” from the item’s associated Actions menu.
On the Check-In screen, click Browse to search your computer for the document to upload. Once the appropriate item has been selected, it will be added to the Check-In field.
Click Upload to complete the process, and the item will show as Checked-In.
Note: A Check-Out can be canceled (e.g., if a revised document does not need to be uploaded) by accessing the Actions menu associated with the checked-out item and selecting “Cancel Checkout.”
The Study Items List Page is a place to view all of the Items for a Study. One benefit of using the Study Items List page is it allows you to see what status the items are in.
Navigating to the Study Items List Page
From the User Home Page, select the name of a Study in the Recent Studies List or Favorite Studies List. If the study is not listed, you can search for it by clicking the More Studiesbutton at the bottom of the page.
Filtering the Study Item List
In an unfiltered study item list, you will see all planned and received documents for all countries and all sites. One way you can limit the study items displayed is by using the Countries and Sites breadcrumbs.
When you choose a country from the country breadcrumb, you will see all study items that apply to that country and all study level study items. Selecting “All Countries” from the breadcrumb will show all country level study items. Selecting “No Countries” from the breadcrumb will display only study level study items.
You can also limit the study items displayed using the Sites breadcrumb. The Sites breadcrumb menu displays all sites by country code, site ID and PI Name. You can find a site by typing any part of the entire string. For instance, here the user locates the site where Richard Smoots is the PI by typing “smo”.
Since the site is located in South Africa, the country in the Country breadcrumb will be set to ZA (South Africa) automatically when this site is selected. The Study Items list will then display all items at the study level, all items for the country of South Africa, and all items for the site 4444.
You can also limit items displayed using filters in the Narrow Choices panel on the left.
Key Information
Information about an item is displayed on the Study Items list. Study item metadata can be found under each item. Clicking on an item’s record displays more information. An item shaded in pink is past due.
Actions Menus
Each study item has an Actions menu that displays all actions available to you based on the status of the study item, your relationship to the study item, and your role/permissions.
The list also has a dedicated Actions menu containing actions that can be performed on items in bulk. Again, the actions available will vary based on your role/permissions.
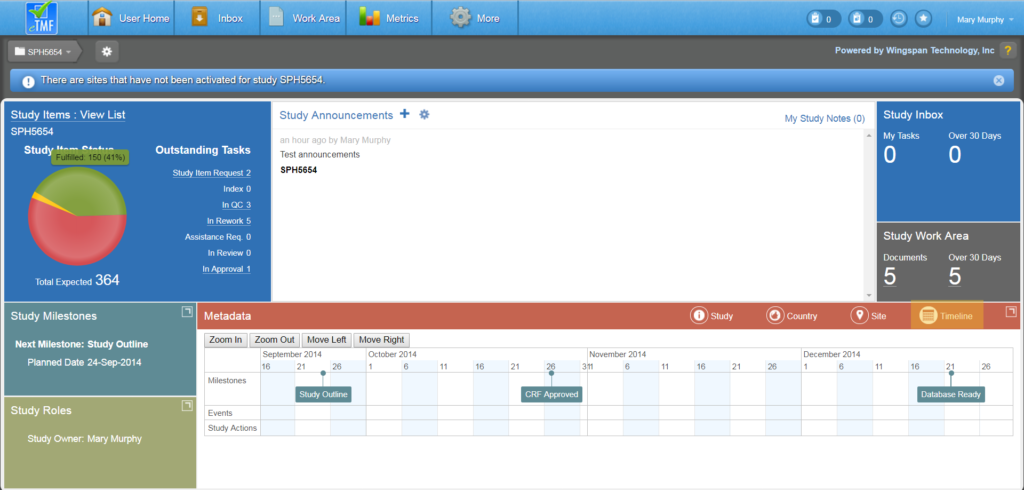
The Timeline View component displays on the Metadata panel of the Study Home page to users in the TMF View Timeline group.
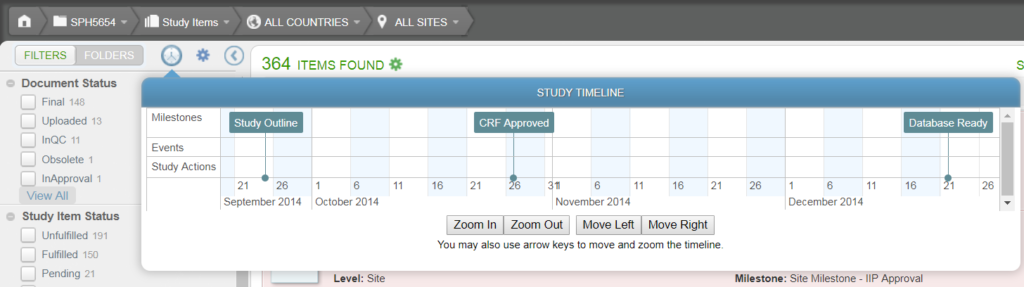
The Timeline view can also be displayed by selecting the wall clock icon from the Study Items List page.
The timeline graphically displays the milestones, events, and actions in each study. Specifically, the timeline displays:
Each study milestone, associated with its actual date (if there is one) or its planned date. These milestones can be clicked to display the documents associated with them in the study item list.
Each event that has been configured to display in the timeline, at its event date. These events can be clicked to display the documents associated with them in the study item list. Only events created after the event type is configured will display, not historical events.
Each execution of a study, country, or site wizard on its execution date. Each wizard can be clicked to display the documents associated with them in the study item list.
All study locks, unlocks, and archives
The Zoom In/Zoom Out buttons help you focus on a specific date range in detail. For example, zooming in on the view above displays the timeline at a more granular date level. The Move Left/Move Right buttons help you scroll backward or forward within the timeline.
To display detailed, in-scope, information, hover over a text box with your mouse.
The Downloads page can be accessed by selecting the More tab in the primary navigation header and selecting “View Downloads” from the menu. The Downloads page displays the list of export filesavailable to the user.
Select on the file’s hyperlink to either download the file to your default download location or to browse for a location for downloading. The exact behavior of the link depends on the browser being used. For example, depending on your browser, you may also be able to drag and drop a link to the content to your local file directory.
The export files are automatically deleted on their expiration date or can be manually deleted by accessing the Actions menu associated with that download and selecting “Delete.”
Export files can be filtered by using the options in the Narrow Choices panel (e.g., Download Type, Created Date, etc.). Export files can be sorted using options in the Sort menu at the top right corner of the screen.
You can export content and metadata for an ongoing or final study to a secure FTP site using the “Study Export” option, which is available only to Business Administrators within the Actions menu of the Study Home page or study item list.
Note: Since Study Export is a resource-consuming process, only one study export can be requested per day per study.
Click on the Actions menu icon for the study item list or on the Study Home page for the study you want to export and select “Study Export”. The Export Study screen appears, displaying a notice about the sensitivity of the documents to be exported.
Click in the Document Statuses field and select the statuses of the documents you want to export. Available statuses include InQC, Final, Superseded, and Obsolete.
In the Export Only Final Submission Documents field, select “Yes” if you want to include only documents that have been marked to be included in a regulatory submission (as defined by the document type). To see which documents fall into this category, you can filter the study item list by the Export For Regulatory Submissions facet.
In the Content to Export field, select whether to export only PDF renditions, native content (if not PDF), or both.
In the Export Unblinded Documents field, select “No” if you do not want to export documents containing information that could unblind the trial.
In the Export Restricted Documents field, select “No” if you do not want to export documents marked as restricted.
In the Export Audit Trail field, select “Yes” if you want to export audit trail entries for the study items being exported.
In the Export Business Documents field, select “No” if you do not want to export business documents. Note: This field appears only if you have permission to view business documents in the system.
If you want to export only study items finalized after a specific date, enter that date in the Export Date Range Start field.
If you want to export only study items finalized before a specific date, enter that date in the Export Date Range End field.
In the Export Format field, select the desired format from the drop-down list. Note that if you choose the TMF Exchange Mechanism format, you will be prevented from exported documents with a status of InQC.
Click Export.
If the study export was successful, you will find it on the Downloads List Page. Click on the zip file for the study to download the file.
If you exported to the Wingspan eTMF format, the files are organized into a study/country/site folder structure. The following files are included:
an Excel manifest file containing a row for each study item exported and the folder path for each study item
an xml file containing the audit trail (if the audit trail was exported)
a HIPAA notice
An xml file for each study item exported
A content file for each rendition of content exported
xml files containing study information, country information, and site information
If you exported to TMF Exchange Mechanism format, the files are organized into a TMF Reference Model folder structure. The following files are included:
an exchange.xml file containing metadata for all content exported, as well as audit records (if included in the export)
a content file for each rendition of content exported
Possible reasons for an unsuccessful export include network connectivity issues or a database connectivity issue. Additionally, Exports over 2 gigabytes in size will not be successful.
Workflow tasks represent individual steps that must be completed within a workflow. A given workflow may contain multiple tasks, where each task has an assigned meaning and dedicated recipients responsible for completing it.
The definition of a workflow task determines the following:
The type of workflow in which the task can be used (Review or Approval)
If applicable to an Approval workflow, the type of approval to collect (eSignature or eApproval)
The meanings that can be attributed to the task (e.g., Regulatory Approval, Legal Approval, etc.)
The minimum and maximum number of recipients that can be assigned to the task
The groups of users who can be assigned to the task
Workflow tasks can be defined and maintained on the Workflow Task Definitions page, which is accessible in the View Configurations area to users with Manage Workflow Templates feature permissions. Once workflow task definitions are defined, they can be made Effective using the “Make Effective” Actions menu option and then added to one or more workflow definitions.
Managing Workflow Task Definitions
If you need to make changes to the task definition after it is Effective, you must first return the definition to Draft status using the “Revise” Actions menu option and then use the “Edit Metadata” option to actually make the changes. The Effective definition remains in use while edits are made to the Draft version. To use changes made in a Draft version, you must make the version Effective again.
An effective version can be made Obsolete in order to remove it from use.
To create a new workflow task definition, click on the Actions menu icon on the Workflow Definitions List Page and select “Create Workflow Task Definition”. Or to edit an existing workflow task definition, click on the Actions menu icon for a Workflow Task Definition that is in Draft status and select “Edit Metadata.” If the workflow task definition is Effective, return it to Draft status by first selecting “Revise” from the Actions menu.
Steps for Creating a New Workflow Task Definition
Enter a Name for your workflow task definition.
(Optional): Add a description for your workflow task definition. The description will be displayed to users responsible for assigning this task during workflow initiation.
Choose a process type by selecting the drop-down arrow next to the Process Type field. The two options for this field are “Review” and “Approval”.
If you chose “Approval” in the previous step, specify an approval type by selecting the drop-down arrow next to the Approval Type field. If the approval type is “eSignature”, the user who completes the task will be required to enter their eTMF login credentials as their electronic signature (equivalent of a handwritten signature), and the signature will be viewable on a signature page/certificate. If the approval type is “eApproval,” an electronic signature will not be required upon approval. If the approval type is “N/A – QC Review”, the task will be the first stage review task in a combined review/approval workflow. The task will be assigned to the TMF QC Role group, allowing any member of that group to acquire.
Click in the Meanings field and choose one or more meanings for the task from the drop-down list. To see more options, scroll down in the list. Multiple meanings can be added. A task may need multiple meanings if it can be assigned to multiple groups of users. Available meanings are maintained in the Meanings dictionary. To remove a selected meaning, click the X next to it.
Enter a minimum and maximum number of recipients. The default minimum is one recipient and the default maximum is 10 recipients. Note that these fields are available only if the task is not a QC Review task.
Click in the Performer Group IDs field and select one or more user groups containing the users who can be assigned to this task. To see more options, scroll down in the list. To remove a selected Performer Group ID, click the X next to that Performer Group ID. If no groups are selected, the task can be assigned to any user. If the task is being configured as a QC Review task, this field is automatically populated with the TMF QC Role and is disabled.
Click Create (if you are adding a new workflow task definition) or Save (if you are editing an existing definition).
Keep your Work Area up to date by deleting documents and transmittals if you realize they should not be released into the eTMF.
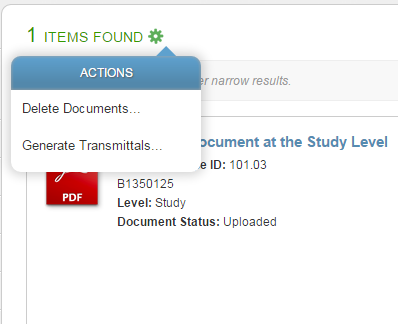
You can delete an individual document by choosing Delete from the Actions menu for the document or multiple documents by selecting Delete Documents from the Actions menu associated with the Work Area (shown below).
Selecting Delete Documents will generate a list of documents in your Inbox to delete. By default, all documents in the list are selected for deletion. Deselect the check box for any you do not wish to delete and click Delete Selected Documents.
You can upload one or more documents at once by using the Upload Documents button in your Work Area. When using this operation, the documents will need to be indexed to study items as part of a separate action.
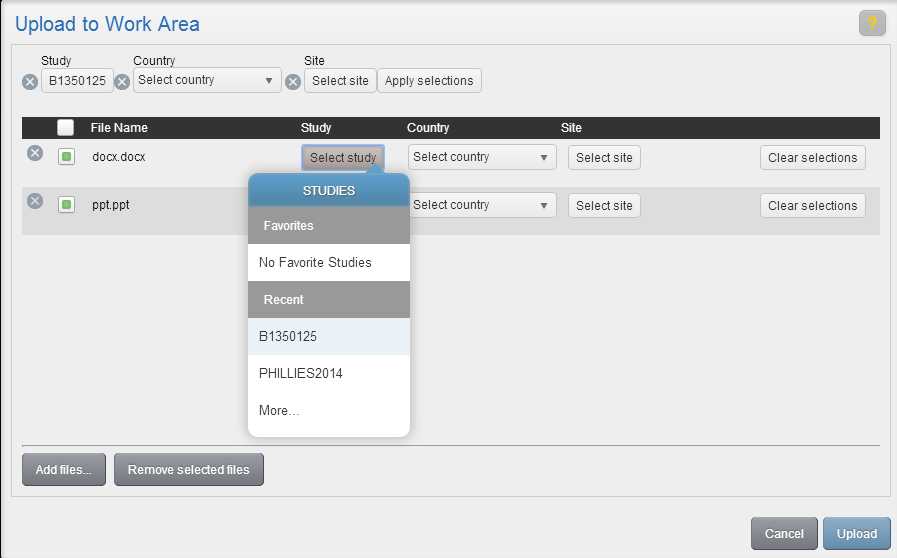
When you click the Upload Document(s) button, the Upload to Work Area screen is displayed, as shown below.
Click the Add Files button to browse to and select the files you want to upload. The selected files will be added to the list on the Upload to Work Area screen. To remove files from this list, click the x next to an individual file or select the check box for multiple files and click Remove selected files.
You can choose to upload all documents within a specific Study, Country, or Site by selecting the corresponding values at the top of the screen. Any Study, Country, or Site values specified will be retained if the Add files button is selected again. You can also specify a study, country or site for an individual file by using the corresponding fields within the file list. Any settings specified for an individual file override settings specified for the list as a whole.
Or, you can upload without choosing study, country, or site values, if those values are not known.
When finished, click the Upload button. The documents will now appear in the your Work Area.
The Match to Document Type screen can be accessed by selecting the TMF Master Listhyperlink at the bottom of the Match to Study Item or Match Program/Enterprise Document screen.
How to Match a Document to a Document Type
The Match to Document Type screen will display all document types by default. The Document Types list can be updated to display only ad hoc document types by selecting the Show Ad Hoc Only check box on the left side of the screen.
From the Match to Document Type screen, select a document type from the list to propose a new study item. From the Propose Study Item window, review the details for each field. Fields that are gray may not be changed. Fields that are red are required. For a description of a field, select the “i” next to it.
Note: You will be proposing a new study item with these attributes which may be subject to approval.
When you are satisfied with the information in the data fields, click Save. You are returned to the Match to Document Type screen, and the proposed study item is listed at the top.
To match to additional document types, select another type from the list and complete the fields in the Propose Study Item window as instructed above. To remove a proposed study item, select the X next to the proposed item in the grid above the list of document types.
To complete the matching, click Save on the Match to Document Type form.