| Scanning Topics | |
| Scanning Methods | |
Tag Archives: 2.4
Managing Expected Documents
Finding Expected Documents in the Work Area
To see Expected Documents in your Work Area, go to the Narrow Choices panel and select Expected from the Document Status facet.
Note: These expected documents are mostly private to you. Most other users can’t see your expected documents, however, other users will be able to see the fact that you have Uploaded a document against a specific study item. Users with appropriate permissions will be able to view your Work Area and thus see your expected documents.
Completing Indexing
If you have created an expected document, you can add more Indexing information to that expected document before creating the transmittal.
To add indexing information to an expected document:
- Click the Name of the Expected Document in your Work Area.
- Add or Edit the values in the Metadata tab.
- Click Save when the information has been updated.
Scanning Methods
| IF | THEN |
|---|---|
| You have received documents and are readily able to locate their associated study items | Locate the Study Items, create Expected Documents for them and supply all metadata, and print transmittals. (Click for more details) |
| You expect to receive documents but don’t actually have them, and are readily able to locate their associated study items | Locate the Study Items, then create and print transmittals without supplying all metadata. (Click for more details) |
| You have received documents that don’t have existing study items created for them | Create a number of expected documents, completely index and match to proposed study items, and print transmittals. (Click for more details) |
| You expect to receive documents that don’t have existing study items created for them | Create multiple expected documents, partially index if desired, then print transmittals. (Click for more details) |
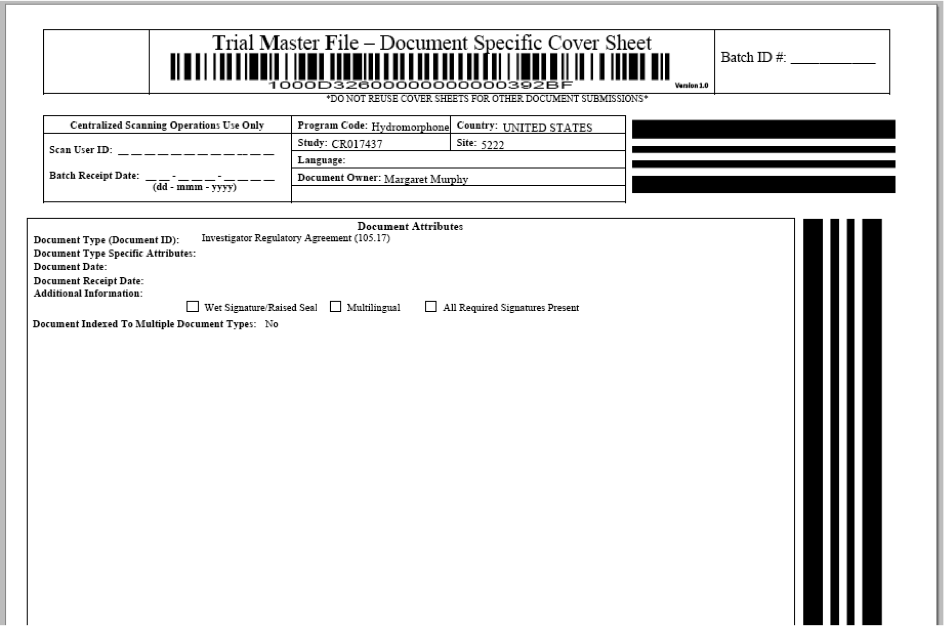
Scanning Process Overview
When documents are available in paper only, a Transmittal is created and included in front of the documents as they are scanned.
The Study Items are marked as Expected Documents in eTMF.
After scanning, the scanning software releases the scanned documents into eTMF
Site Select
The Select Site screen helps you get to the site you need to work on.
You can use this screen to add sites to your Favorites so they show up on your User Home Page.
The Select Site screen can be reached by clicking the More Sites button at the bottom-left corner of your User Home screen when the Sites Grid is shown.
How to Find a Site on the Select Site Screen
If your list of sites is short, use the scroll-bar on the right edge of the Select Site screen to scroll down to your site.
Use the page numbers and paging arrows at the bottom of the screen to jump to other pages in the list of sites.
If your list of sites is long, use the boxes above the list to filter it down.
Enter your filter criteria into one or more of the boxes, then click Go.
How to Add a Site to your User Home
If you are going to be working with a site often, you can click the star in the second column to mark that site as a Favorite. Once a site is marked as a Favorite it will be displayed in the list of sites on your User Home page for quick navigation. To unfavorite a site, select the star again.
To go to the Study Items List for a Site, select the radio (circle) icon next to a Site on the Site Select Screen and click Apply.
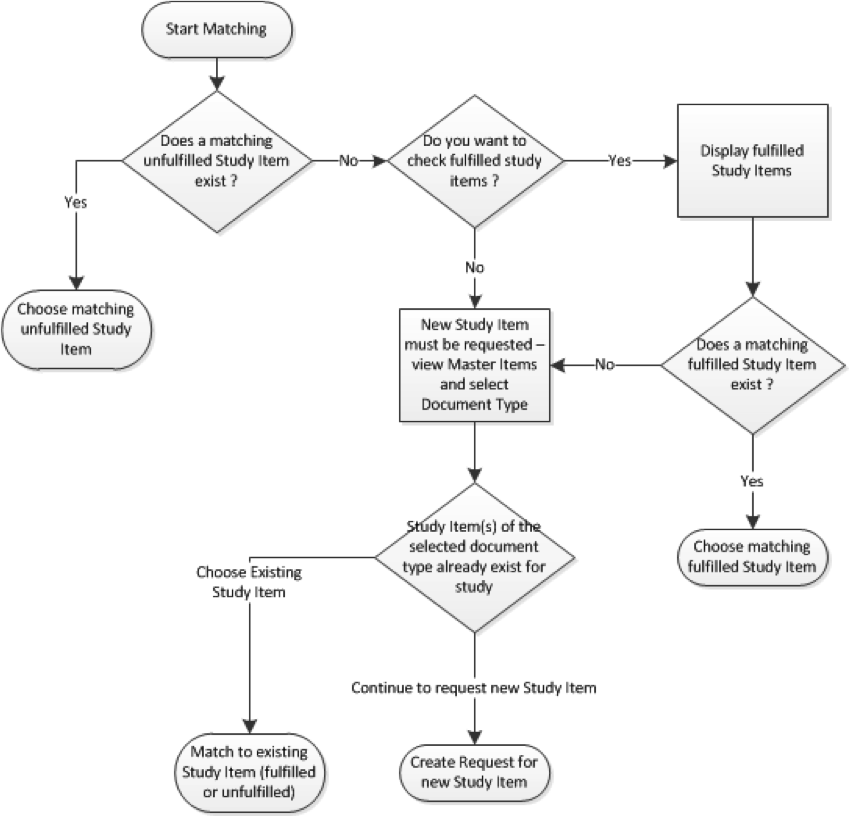
Matching Process Overview
PDF Renditions
eTMF will generate a PDF automatically for most formats. You will not be able to submit to QC until this process is complete.
If the format is not renderable or is too large to render, you will be able to view it in its native application. You will be able to submit to QC.
Documents over 200 MB will not be rendered to PDF.
Common QC Task Outcomes
| If | Then | What Happens? |
| The document is correctly matched and the content and metadata pass all QC checks. | Select Finalize. | Document becomes final. |
| Content is correct but index and/or metadata are incorrect and you want to make corrections instead of returning for Rework. | Select Correct. Make metadata or indexing corrections.Choose reason(s) for correction and send back to QC.
Note: If your environment is configured to bypass a second round of QC after corrections, you’ll have the option to Finalize instead of the option to send back to QC. |
Document re-enters QC Workflow and appears in the group inbox of the Document Specialists.
If the option to Finalize is available and is chosen, document becomes final. |
| The wrong study item was chosen, or the content or metadata do not pass QC checks. | Select Fail to return for rework, ensuring that you choose all of the reasons applicable to problems found with the document and adding any notes needed so the problems can be addressed. | Document enters Rework Workflow with task assigned to person you chose. |
| You determine that you are not the right person to handle the task. | If you know the correct person, delegate the task to that person. | Document is still attached to QC task, but reassigned to selected user and present in their Personal Inbox. |
| If you are unsure or multiple people could handle the task, return it to the group inbox. | Document still attached to QC task, but returned to the group inbox. |
Multi-Indexing
Documents can be indexed to more than one Study Item.
If your document matches more than one Study Item, you can select multiple Study Items to match to as shown below.
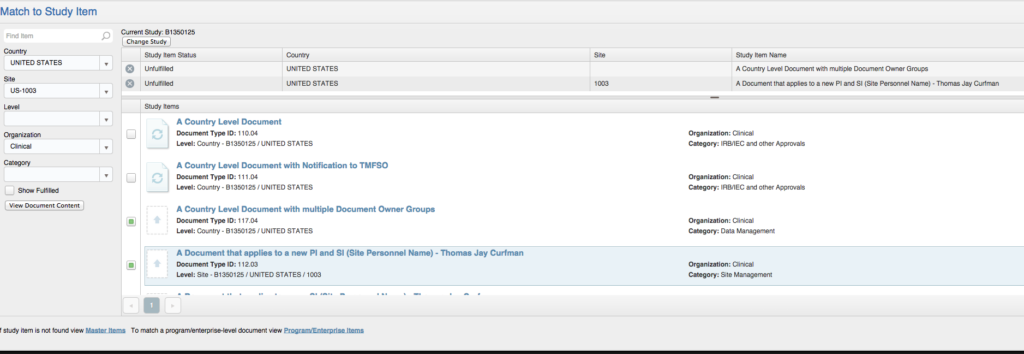
When you have selected all the Study Items that match your Document, click Save.
