Upload Documents to a Drop Zone
When you upload to a drop zone, the system automatically creates a new study item for each document. The study items are created for the document type associated with the reference model ID and level determined by your folder and breadcrumb selections.
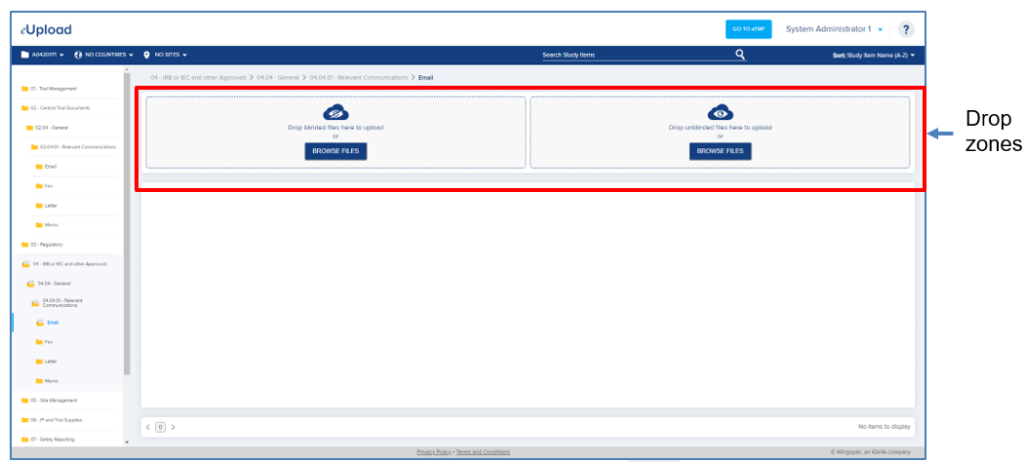
A “Blinded” drop zone is always displayed. If you upload to the Blinded drop zone and the document type allows unblinded documents, the Unblinded value of the document will be automatically set to No.
An “Unblinded” drop zone is also displayed if the following
are true:
- The document type associated with the artifact
has the Can be unblinded setting of
“Yes” - The study selected from the breadcrumb has the Study contains unblinded documents
setting of “Yes”
If you upload to the Unblinded drop zone, the Unblinded value of the document will be automatically set to Yes.
To upload to a drop zone by browsing:
- Click
Browse Files in a drop zone. - Use
the file explorer window to navigate to and select the documents you want to
upload. - Click
Open.
To upload to a drop
zone by dragging and dropping:
- Select
one or more documents you want to upload from your local file explorer. - While
holding the mouse button, drag the documents to the desired drop zone in
eUpload. The text and image in the drop zone turn green. - Release
the mouse button.